Updated: Dec 29th 2004
The history of my XS650 (Year 2004)
[Click any picture to see the bigger one. Well, not supported for the latest pics :-( ]
Latest happenings
The histories tells only the history of my eXeS since it became my property
April 2002.
Here you can see what happened year 2004.
Any information related to earlier phases will be within the
[ In the beginning... ], [ History 2002 ] or [ History 2003 ] section.
Table of Contents
Missing clutch washer
Steering damper
Clutch rebuild
Pluggin the starter out
New rubber for the down side
Not the brushes but the wire attached
25 years old plastic becomes brittle
Real XS650 meters
Bracing the front forks
Rubber against gasoline and vibration
New manifolds for carbs
Final fixes and road calls again
Bicycle computer
2 - 1 exhaust preparation
Ancient GIVI fairing
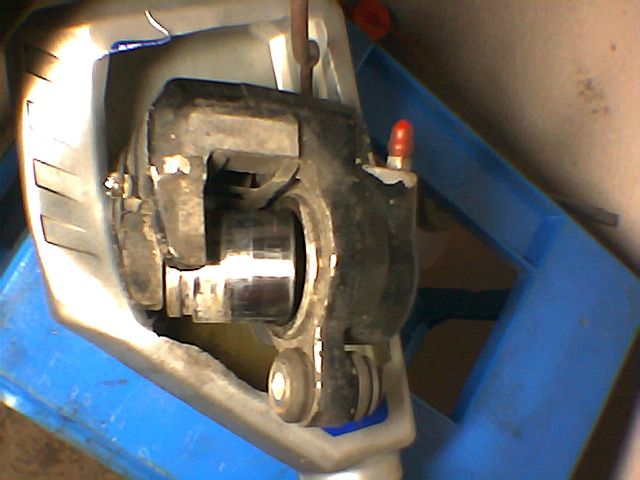
Easy disk caliper disassemble
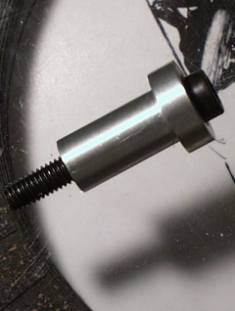
Grease nipple for swing arm
1st January 2004
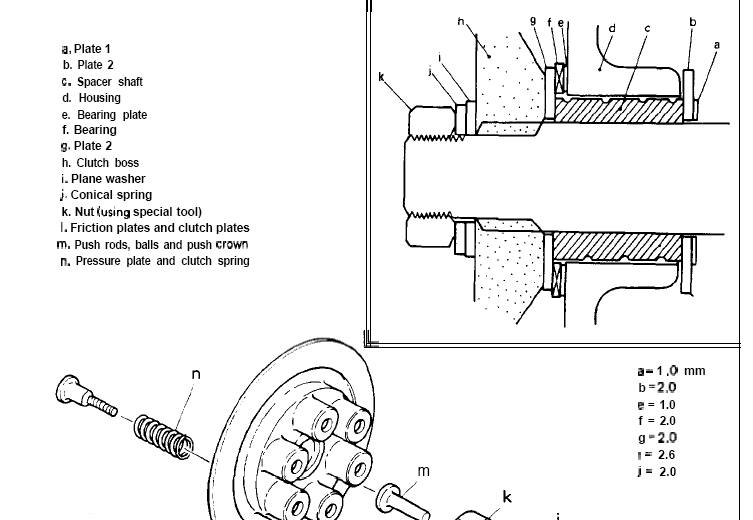
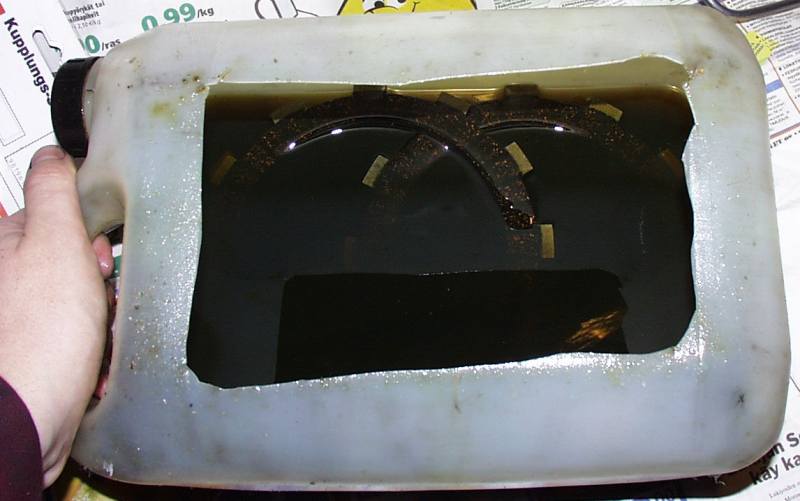
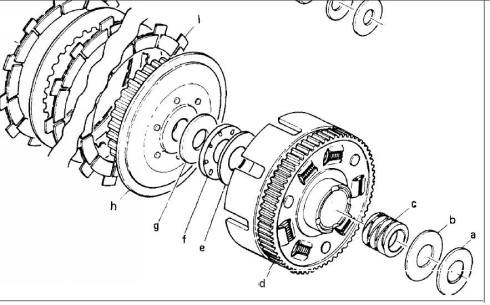
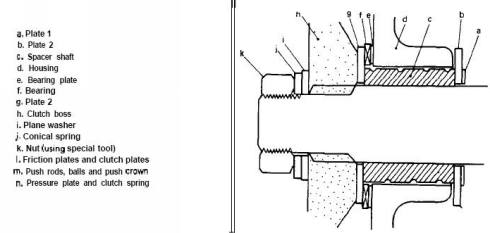
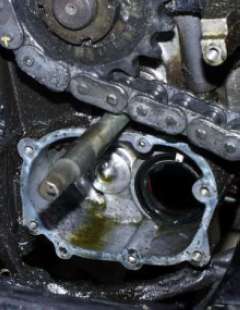
When I disassembled my clutch for sending it for damper springs rebuild
to Halco, UK I noticed that there is one really strange issue in almost
all exploded clutch part illustrations.
Below is an example how things are mainly illustrated (Hayness, Clymer
Mothership, Jean's Parts Lists):

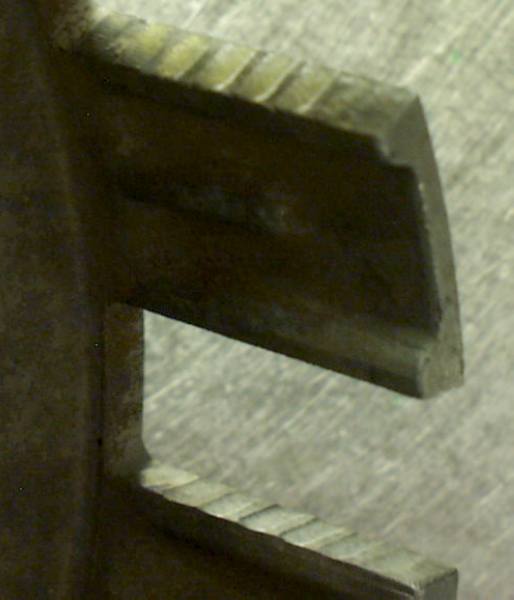
You cannot see any washer illustrated between thrust bearing (3) and
clutch basket (2) or bushing (15).
When I diassembled my clutch there was a washer! I started wondering...
And also faintly remembered hearing about this issue.
I went through all the documentation of XS650 clutches I had and finally
factory manual revealed something that agreed with what I found in my
XS650 clutch.
Here you can see the additional washer (e) between the thrust bearing (f) and
the clutch basket (d).
Also the picture below shows how washers are arranged and the missing washer
is there in the right place (e).
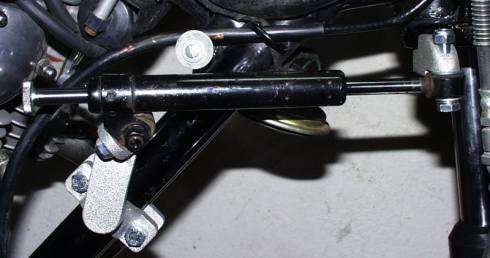
18th January 2004
I wanted to make the front end of my XS650 to be less restless. Tapered bearings
were installed earlier and now was time for a next step.
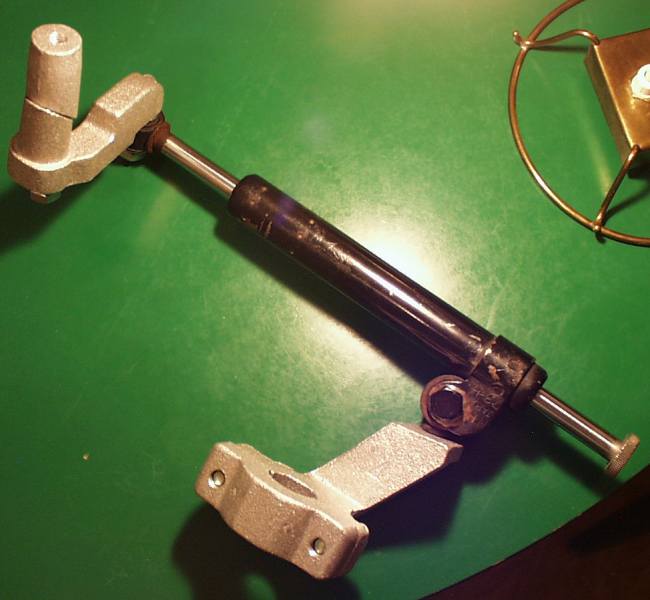
I grabbed (after plenty of futile attempts ;-) an used steering damper from eBay
and XS650 mounting kit for it.
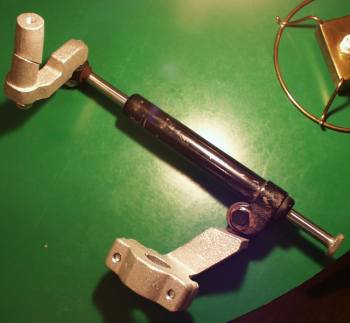
When trying to fit the steering damper in place I noticed that the mounting
kit was far from perfect. The front mounting to be pushed inside the steering
tube was too thick. And the corner of the arm had to cut a little to make it
possible to move enough forward against the lower yoke.
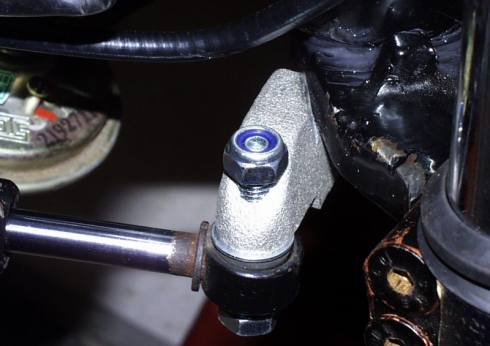
The rear mounting to frame was definately to some other bike than XS650.
The hole for frame tube was about 20mm diameter where XS650 uses 34mm tube.
I grinded those mounting openings to become wide enough.
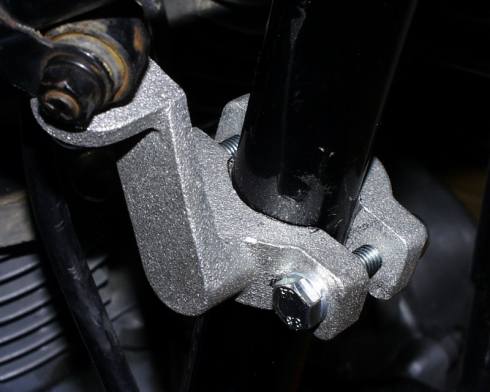
Now the steering damper is installed in place such a way that it does not
restrict the steering movement from limiter to limiter. It is also adjustable
and in the most loose setting it makes almost no effect to steering mobility.
22nd January 2004
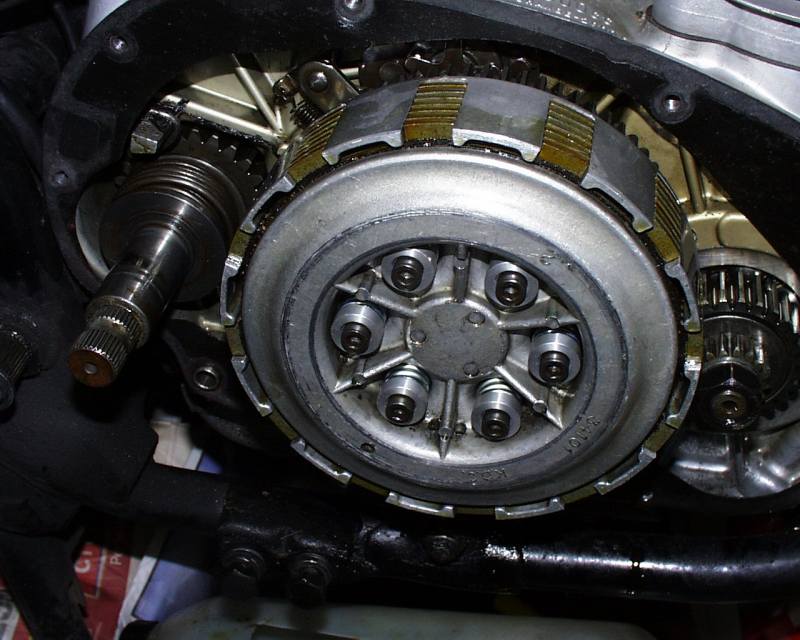
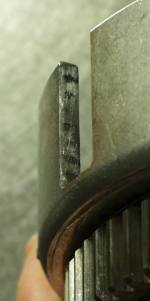
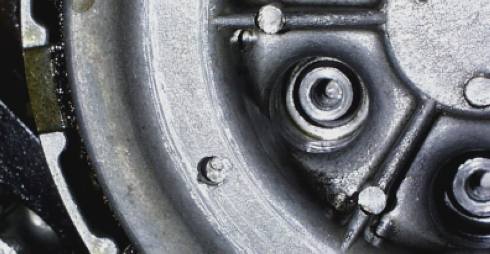
The clutch of my XS650 has shown quite typical symptoms of old age (of XS650).
When checking at previous summer I noticed that two of the six damping springs
were broken. While it is not very likely but still possible small pieces
of very hard spring material can travel to wrong places and in the worst case
(almost) explode the gear box.
Also difficulties to find neutral when warm and minor slipping at heavy loads.
I disassembled the clutch and sent the basket to Halco, UK. They sell the rebuild
service or even parts only for daring ones. It took less than two weeks to get
the basket back with three new springs and three additional ones replaced with
special plastic barrels.

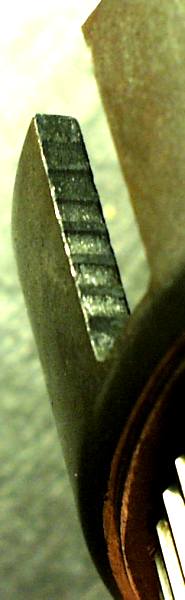
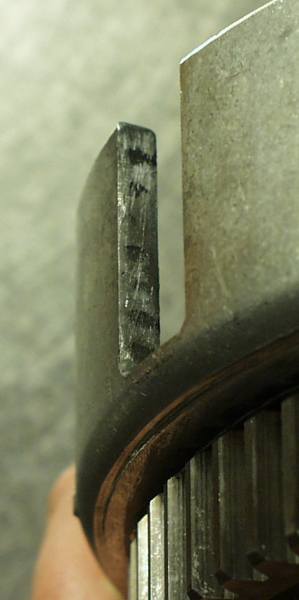
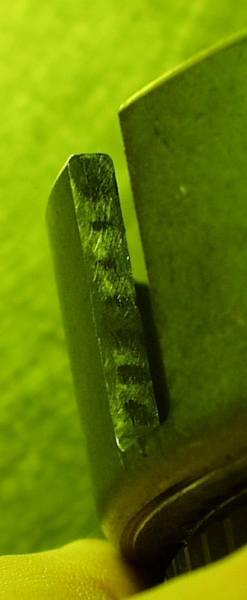
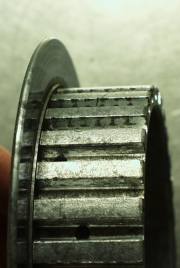
The dogs of the clutch disks erode the basket notches. This can be seen clearly
in the outer basket but also less but still on the inner hub.
These little notches hinder the open and close of the clutch disks and cause
incomplete opening (difficulties to find neutral) and closing (incidental slipping).

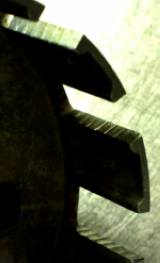

The shop manuals say that you can hone these "markings" unless they are too
considerable and clutch basket must be renewed. How deep ones are too much?
No measurement values given, man must trust himself. Quite evident is that when
filing & honing breaks the symmetry then it is too much.
I decided to take as little material as possible but still enough to enable
unobstructed clutch plate functionality.

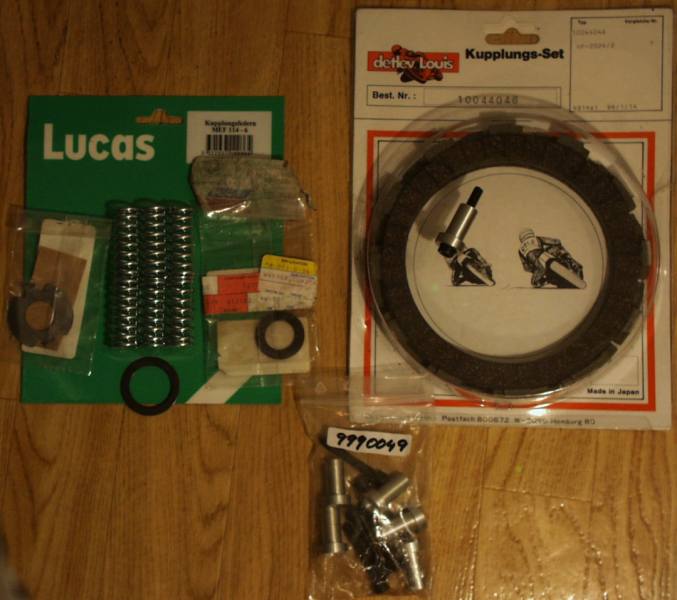
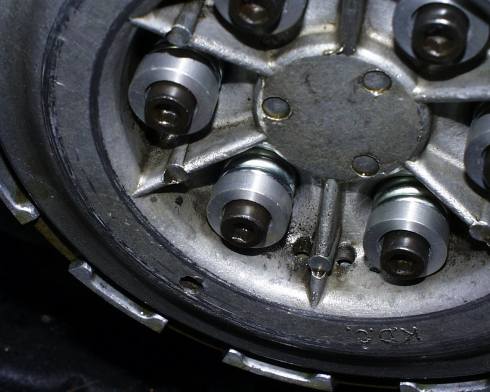
The clutch rebuild meant also a pile of new parts. Plates, springs and bolts.

The new allen head clutch bolts are much easier to use than original crossheaded ones.
One thing to do especially when installing new clutch plates during the riding season
is to soak them throughly (hours) in oil before installing them. Because now is
winter with snow and cold I soaked the plates only half an hour. (They will be
soaking in place (in the motor) still some months before taken into the use.)
The mark of the inner clutch basket should line with the hole in the pressure plate.
Below you can see the rebuilt assembled clutch with new screws and springs in place.
14th February 2004
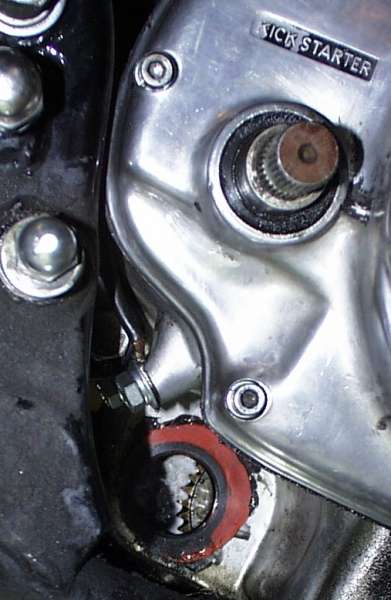
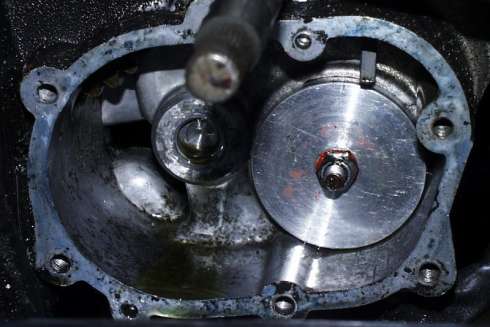
The electric leg of my XS650 hadn't been functional through the riding season 2003.
(Even if it worked perfectly late winter and the electric motor run ok when
connected directly to battery.)
And I prefer the kick start anyway. Quite easy when you know how to and it gives
the right feeling of twentyfive year plus air cooled vertical twin riding :-)
Plus getting rid of unnecessary weight is always good - body or bike.

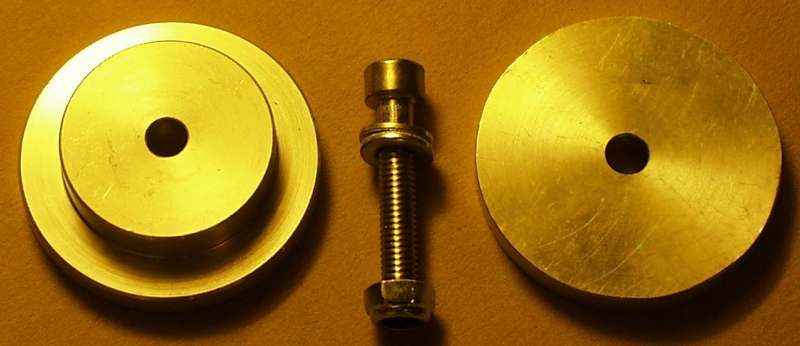
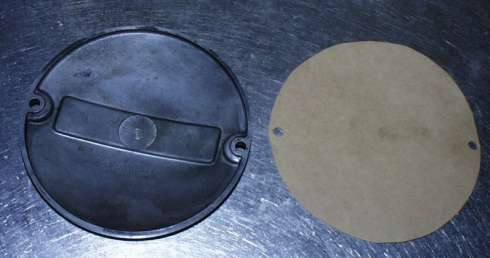
Here you can see the starter mounting hole plug available in many sources.
You can make your own from demolished starter (use the motor end only) but
I wanted to save the motor intact.
Below you can see the disassembled starter gear and the starter mounting hole.
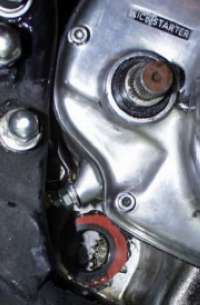
Here you can see the plug in place.
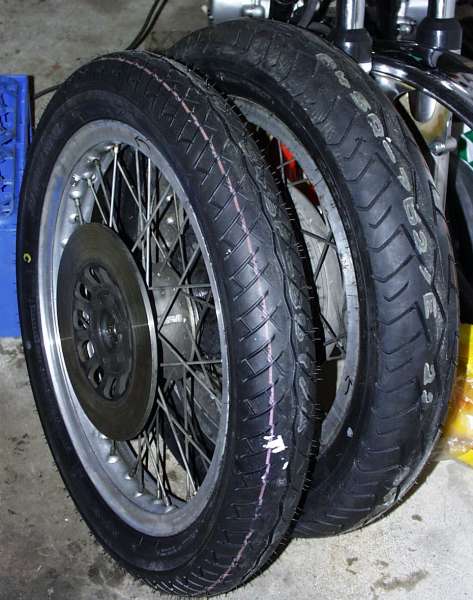
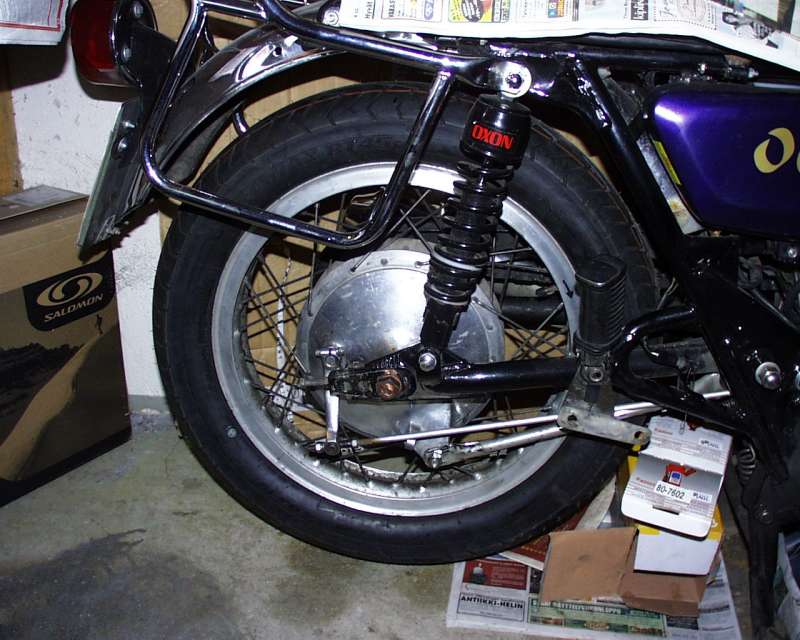
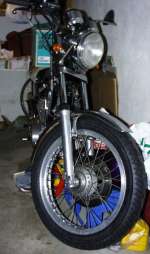
My depth of the thread in my back tire was still within legal limits but I rather
skip the tire change during the riding season. The rubber of the front tyre looked
also so ancient that I choosed the renew both front and the rear tire.
The local MC shop R.M.Heino
offered the best looking bargain of Bridgestone
Battlax BT45 tires. I took the front and back wheel out and fetch them back
after one week from the shop with new tires (+tubes, rim strips & balancing).

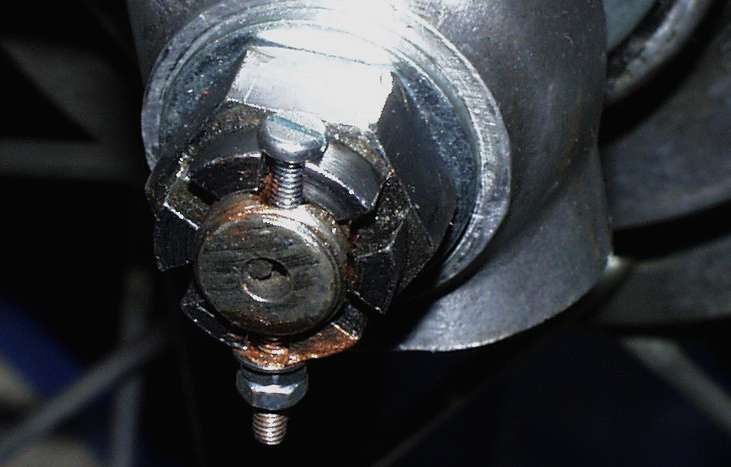
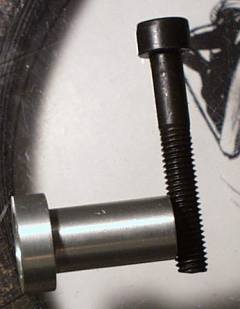
Split cotter pin is mostly used to lock the axle nuts. I did not have any and
the new ones are sold in packets containing too many for my needs. I decided
to use suitable screw and nuts available.

4th March 2004
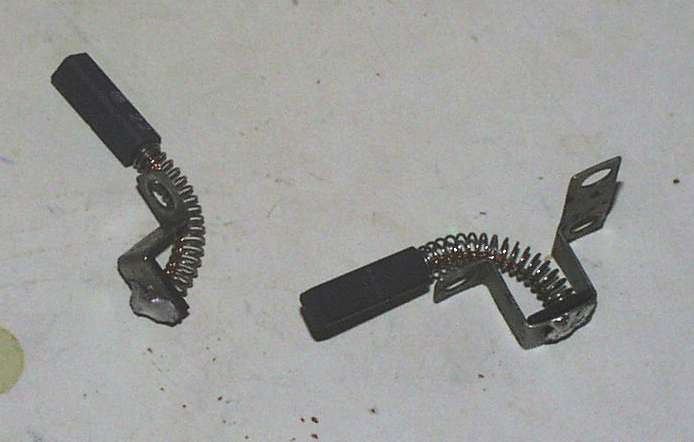
I have had a spare pair of alternator brushes already a two years. The length
of the old brushes have been long enough to keep them in place...
Well, they still are (enough long).
But luckily still I decided to replace them anyway.
After taking them out and just in the middle of exploring them the inner one
broke. The wire between the brush and the connector had worn out!
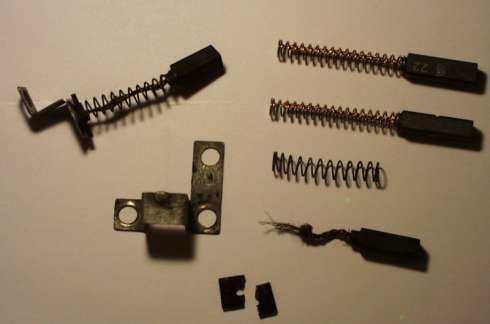
Also the outer brush shows some early sign of the same phenomena. And the small
insulator plate below the spring had broken to two pieces.
(Luckily I have yet another full outer brush set.)
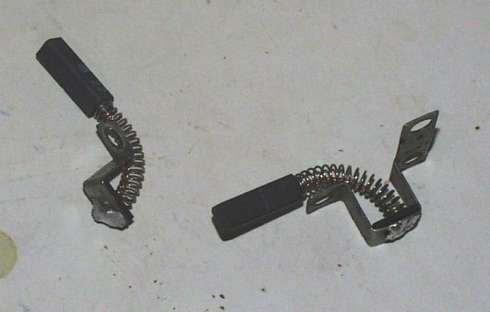
I soldered the new brushes to holders. I did drill a small hole to each, took
the brush wire through it and soldered it to the top.
Lesson 297: Avoid unnecessary bending of old thin plastic things.
Background:
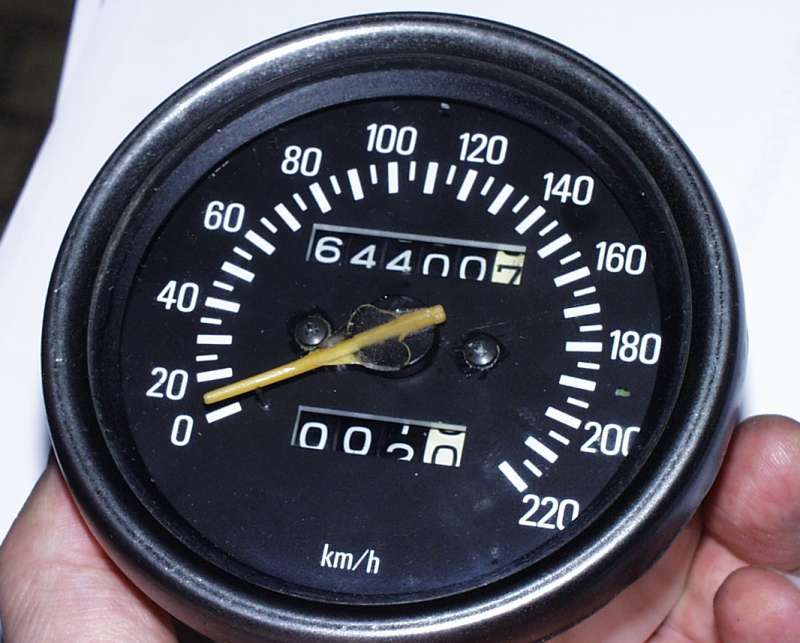
The odometer of my recently bought (from eBay) speedometer did not work.
I managed to open the thing without breaking anything. I even manage to fix
the odometer and assembled the face with Loctite to the screws.
When I was setting the needle to the proper pre-tensioning (it just leans
the "stop pole" with no speedo rotating) I noticed that the needle was too much
bent for my like. I tried to straighten it.
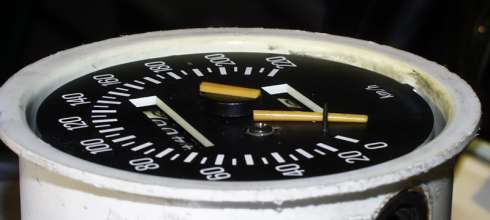
Some fellow XS650'ers reminded me always to use heat gun...
I used the clear epoxy for fix. Not a perfect result but some of "personal touch".

Maybe I'll keep the old speedo for spare.
8th March 2004
Finally after some travelling and winter flu sick bed enjoyment I had a room for
a garage visit. I installed the new alternator brushes. The length of the new
ones made the installation not the easiest one but finally I managed to fit
everything in place and used alled head screws instead of original ones.

The new solderings are a bit "bumpy" and I checked the clearance with the
alternator cover. It was a bit too narrow for my taste and I decided to
cut from gasket board some non-conducting filler between the brush tops and
the side cover metal.
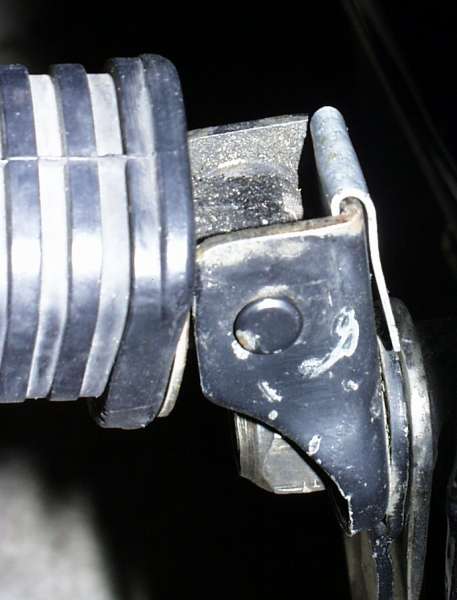
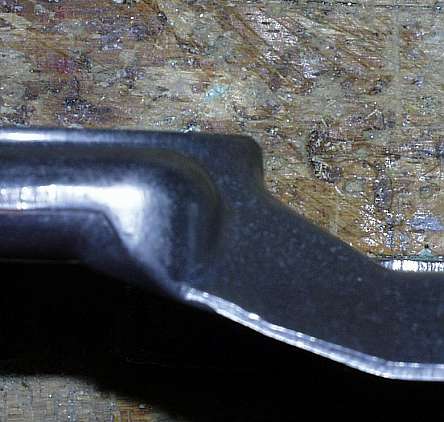
My passenger pegs have looked a bit droopy. I wanted more spitzy look and
checked the pegs and their mountings. The ends of the pegs that lean againts the
bracket had weared and let the outer end of the peg drop more than necessary.
The fix was easy (after I invented what to do ;-). An u-bent metal strip made
the outer ends of the pegs rise again to acceptable level.

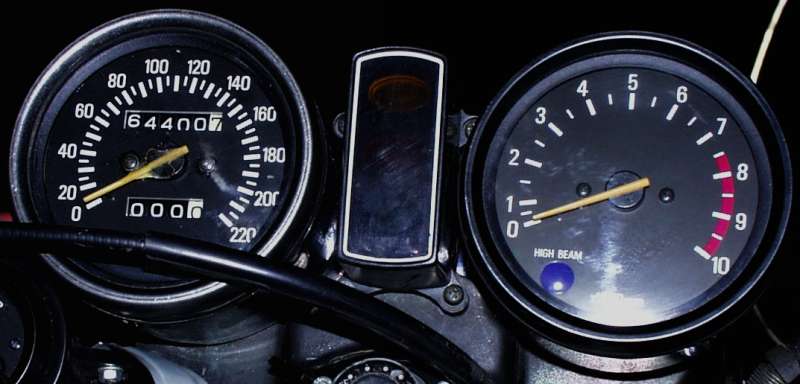
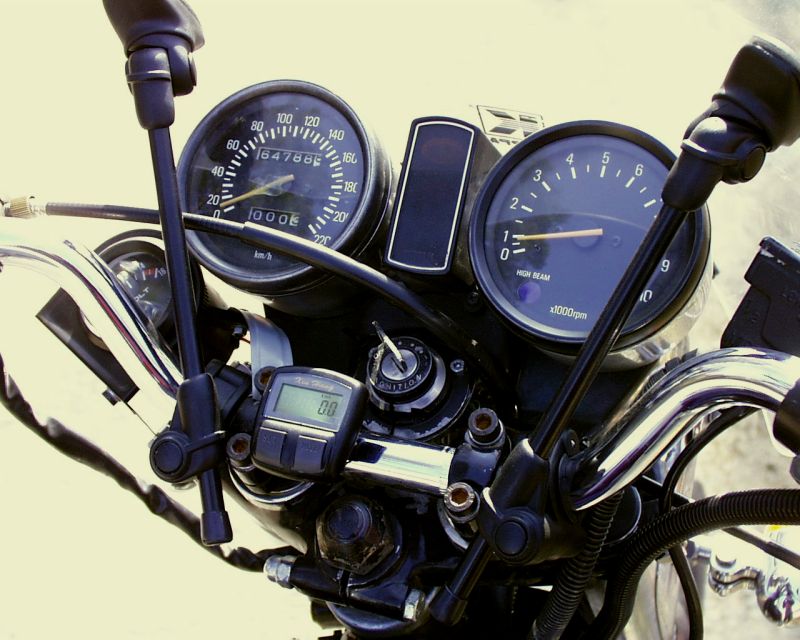
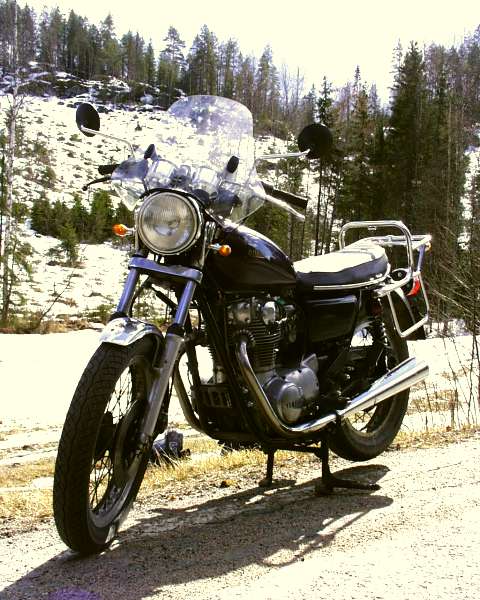
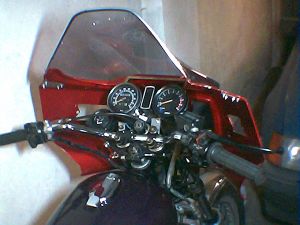
Finally also the real XS650 meters were installed in place. See the speedo
needle ;-)

17th March 2004
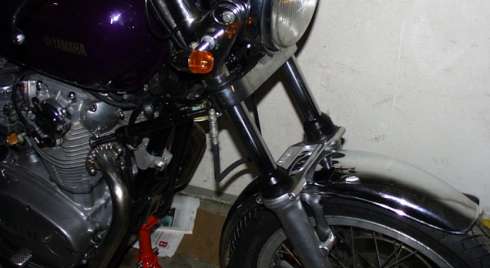
After more than half a year wondering in German and US eBay about the prices
people were willing to pay for a fork brace I manage to grab one original Daytona
for less than $40. (I had previously been willing to pay even $50 but that had not
been enough.)
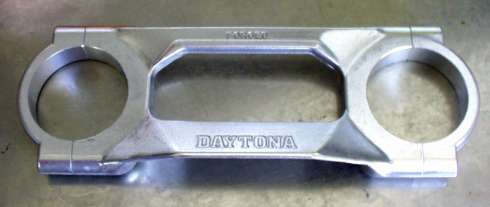
The fork brace was mentioned to be Yamaha XS650 and SR500 fitted. The diameter
of holes were fitted to 35mm forks bottom parts and the distance between those
holes seem to be ok. But the space for the front fender was little too narrow.
At least for the original XS650 front fender.
So I had to take a file in hand a start to modify that $40 piece of metal.
The following pair of pictures shows before and after.

Now there is just enough clearance for the front fender.
The dust covers do not have any more much fork left to grip on. Maybe I'll first try
some black cable tie to keep them in place. Another possibility would be the usage
of fork gaiters. We'll see...
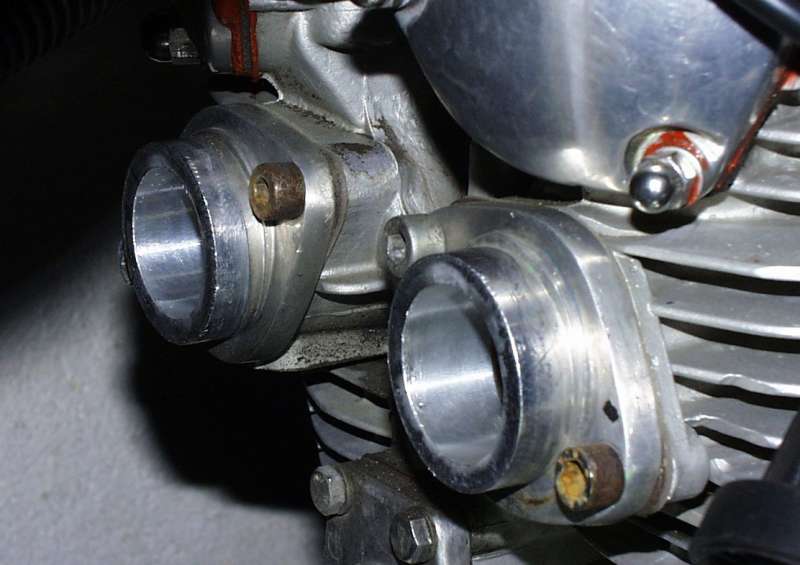
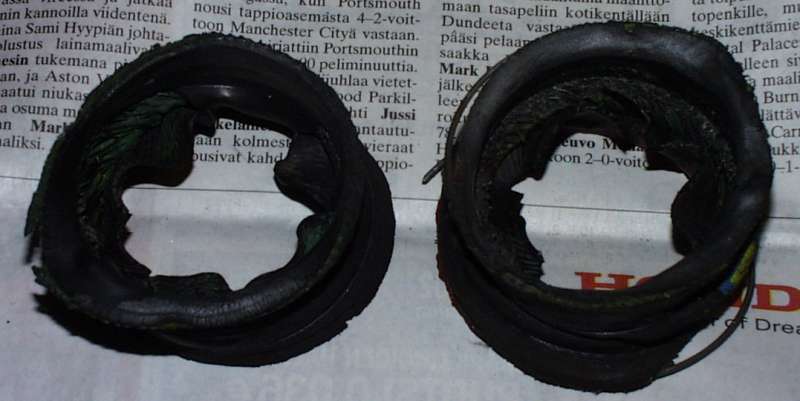
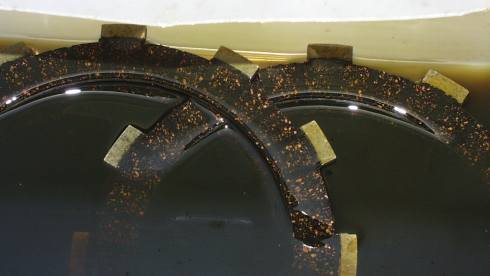
In the end of the 2003 riding season I noticed that my carbs had alarmingly dropped.

Some of those many PO's had built special manifolds for carbs where you can use
a "standard" rubber hose to hold the carbs.

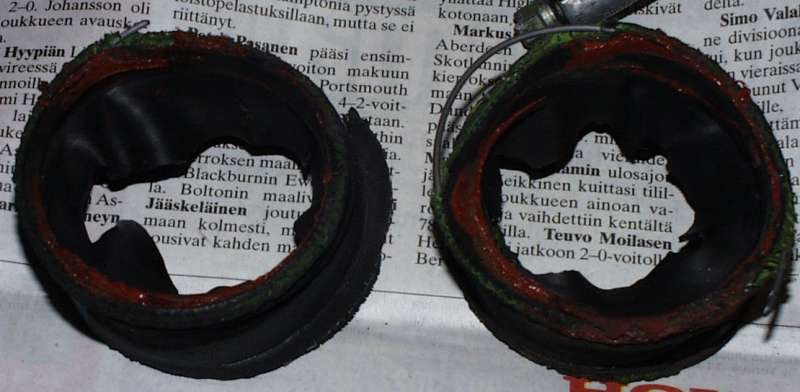
If you know anything about rubber you know that very few grades of rubber tolerate
gasoline. NBR - Nitrile-butadiene, Buta-N is one and it is used in hydraulic suction
hoses. That kind of hose is enough big in diameter and strenghtened with metal nets.
But XS650 is a mighty vibrator. Below you can see how those hoses look after two years
and 7000 miles.

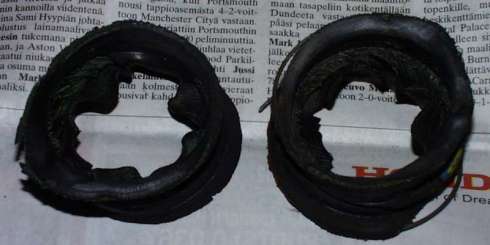
So if you are using this kind of solution you better replace those hoses once in
a year. I decided to use the original manifolds but more about that later.
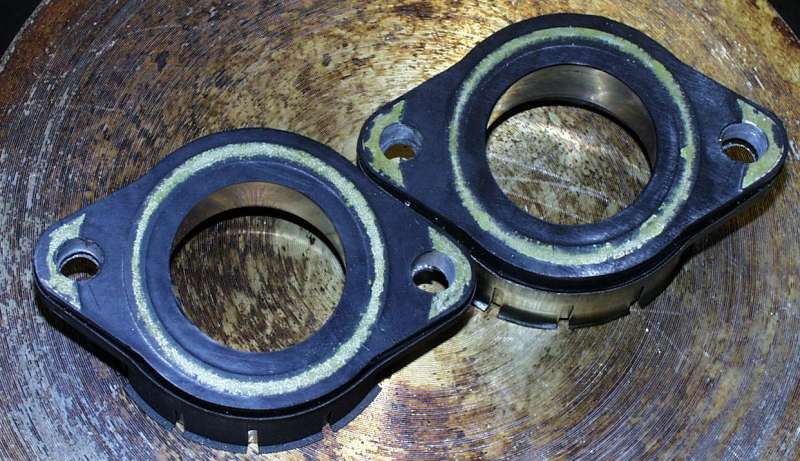
30th March 2004
Riding season is approaching fast. The first motorcycles on streets are already
seen. - Spring is here!
I'm still building and trying to take things easy even if the weather is fine...
I bought the new manifolds and steel "mantles" for them from
Rüdiger a.k.a. xs650shop.de
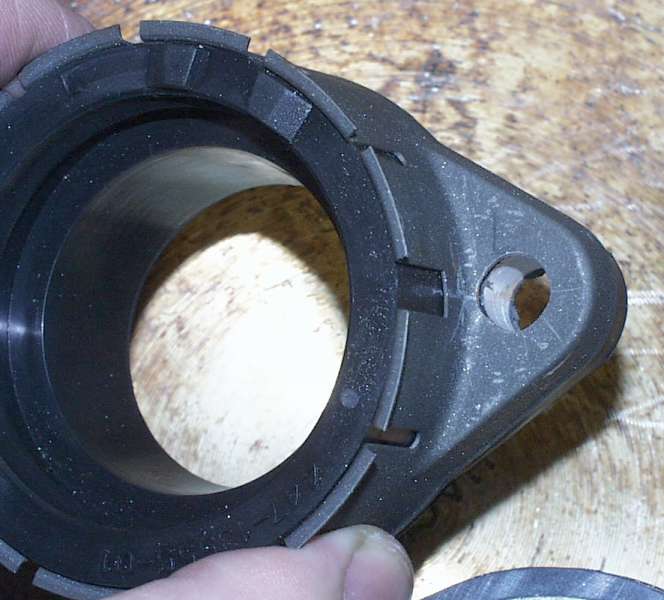
Quite soon I realized that some PO has retapped the manifold bolts for 8mm ones
(the original ones are 6mm). So my next work was to bore the holes of
the manifolds a bit bigger.


The wider heads of the 8mm allen head bolts created the a problem when fitting
the clamp. There is room left only for 4.5 mm wide clamp! Until I find such ones
I decided to use a cable tie instead.

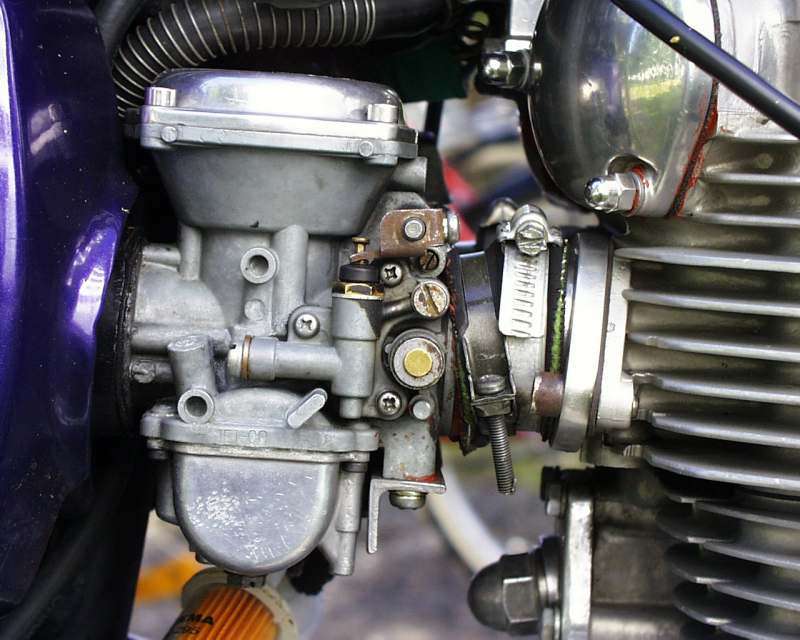
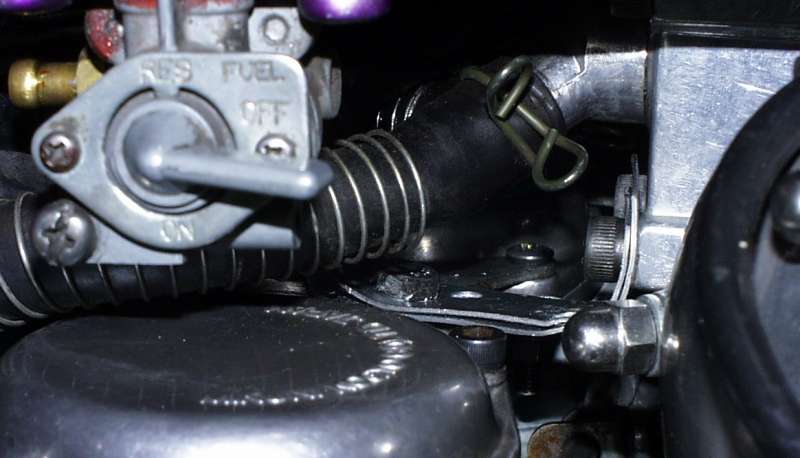
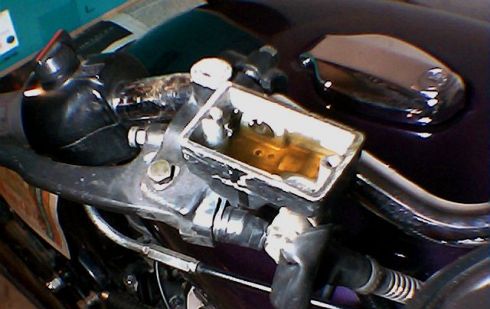
Even if the new manifolds and air boxes support carbs more than old solution
illustrated previously I wanted to have also extra rigid support for carbs.
The result (below) is not the most beautiful but functional.

After taking the carbs in pieces (not the butterflies!) and thoroughly cleaned them
I finally installed the carbs & air boxes in place.
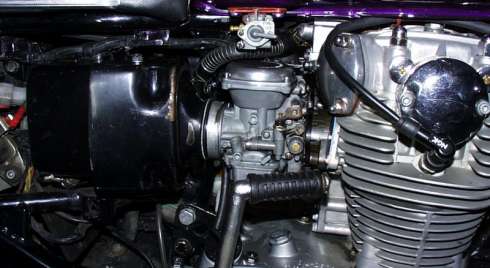
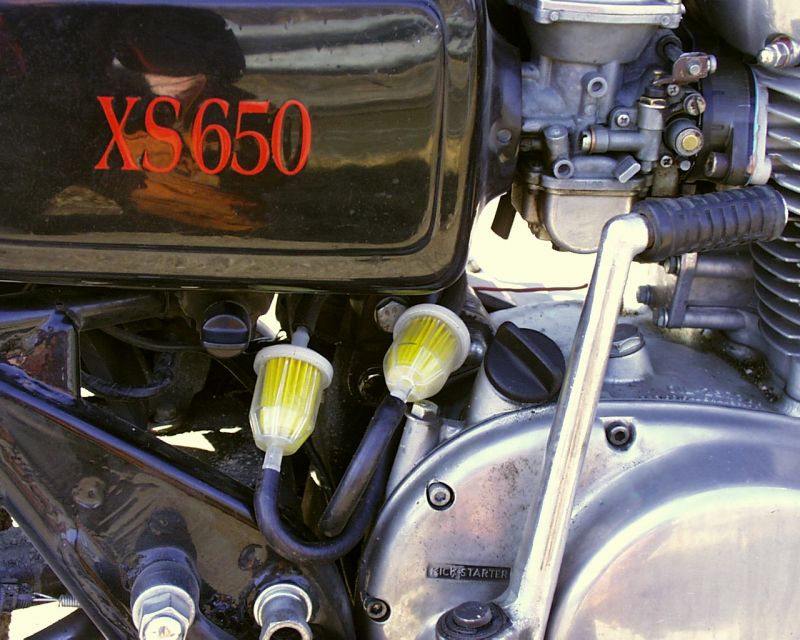
Still I have to invent how to cleverly install fuel lines with in-line filters...
15th April 2004
The fuel in-line filters found a place quite nicely.

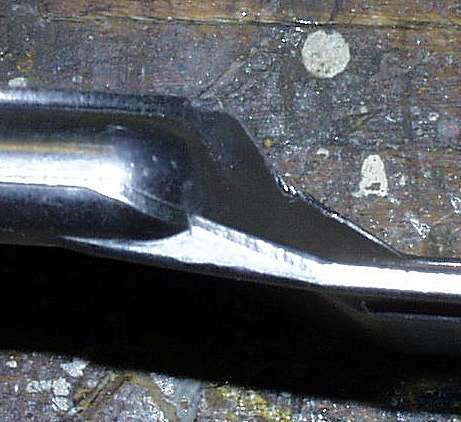
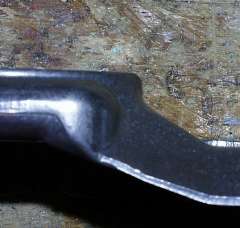
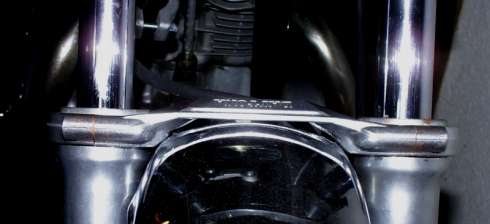
I had to take the fork brace away because it was little bit too narrow. It needs
a bit shimming to let forks move smoothly. That I'll fix lately.
The riding season for year 2004 started 5th of April. Temps went above 5C (40F)
in the afternoons and roads were clear of ice (but not of the gravel...).
Some dirty heaps of snow were seen here and there, not much green to be seen.
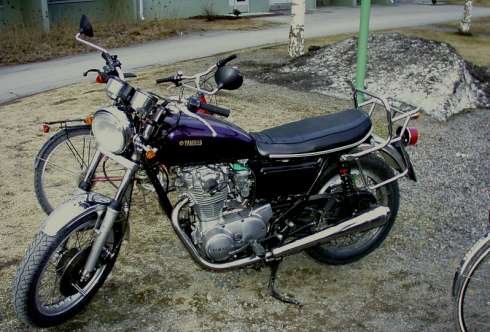
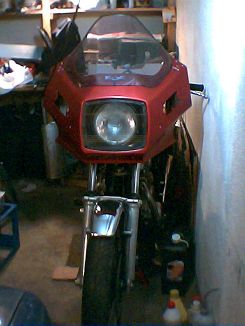
One week later I installed the used wind shield I had managed to grab for $35.
It really is a bit noisy (I'll still try some adjusting later) but definately
keeps me much warmer on my spring rides like pictured here at still snowy
mountains** of north of Tampere where I do live.
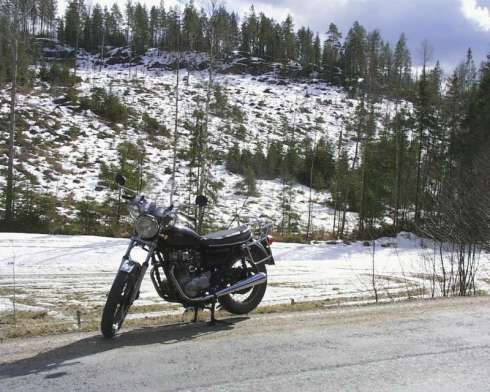
** the mountain in the picture is called Viitavuori. The top lies 150m from the
sea level (50 metres higher than the road). I'm living at 80m level and 20km
riding takes me 50 metres higher ;-) ;-) ;-)
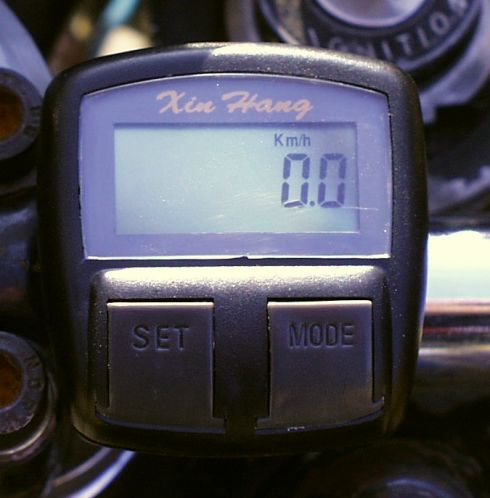
1st May 2004
The odometer of my speedo lasted about 500 kilometers. Because I already once
fixed it and know the effort I decided to try other solutions.
The local auto parts & accessories shop sells also a lot of other kind of "parts"
(bicycling, fishing, gardening, etc.) and I found a very cheap (less than $12)
bicycle computer there. It even supports speeds up to 199 km/h (most bicycle comps
stop to 99 km/h). What a heck! I'll give it a try.
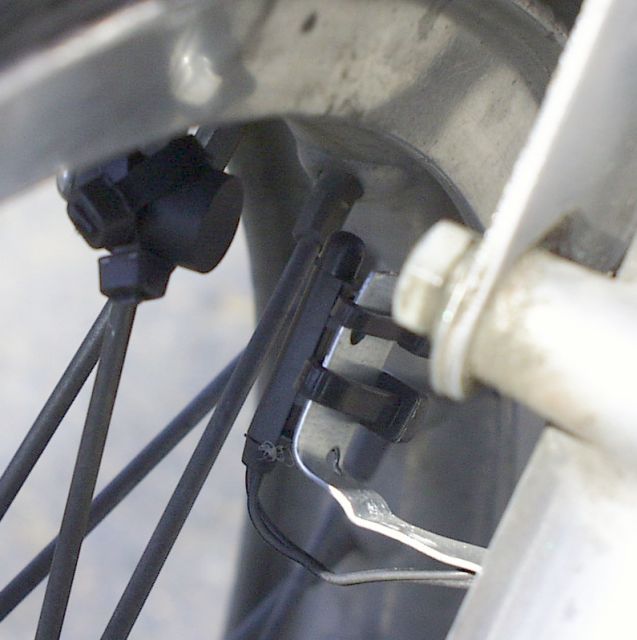
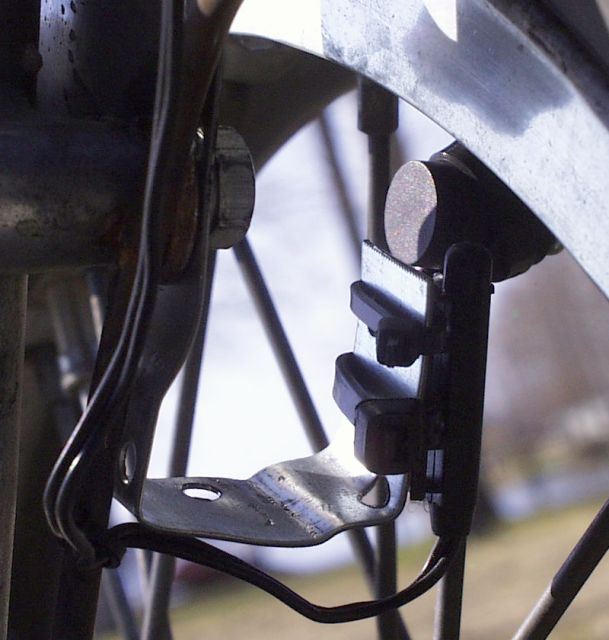
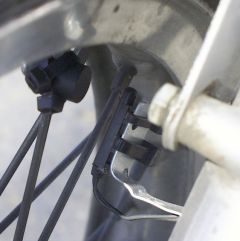
The mounting of the computer itself is quite easy. (It's so small and ment for bikes.)

The sensor mounting is a bit more difficult. There are plenty of different ways illustrated
in the Internet. I copied the installation "method" from Esa-Pekka Salmi's XS650 special.

10th Oct 2004
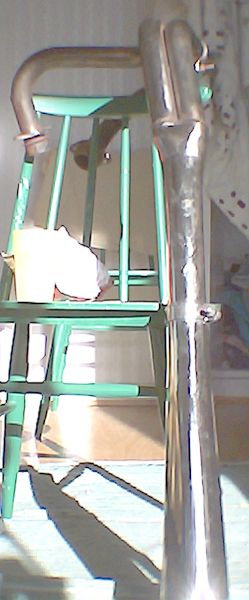
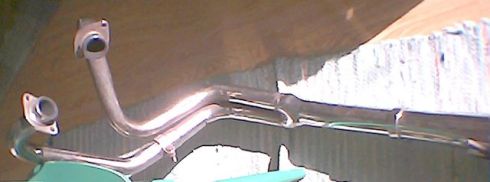
Finally in the beginning of October I fetched the 2 to 1 exhaust from customs.
I won it from eBay beginning of July, seller delayed despatching one month and
surface mail carried it almost two months from U.S.A.
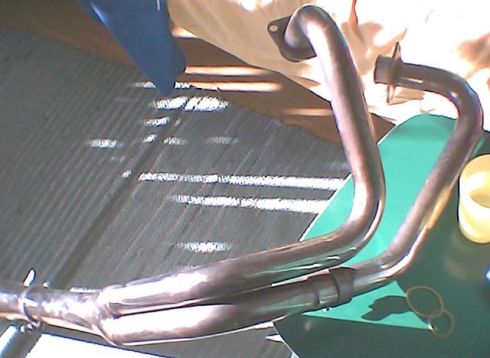
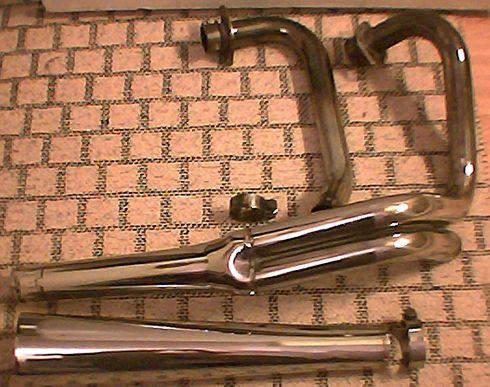
Below is the picture from eBay.
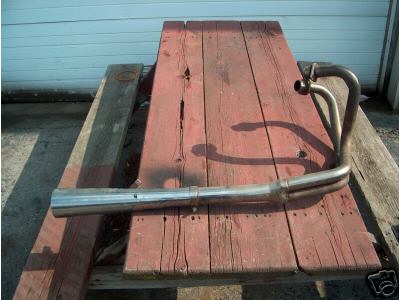
Down here you can see the state of dirt and darkness that arrived. (But in full shape
and packaged excellently.)
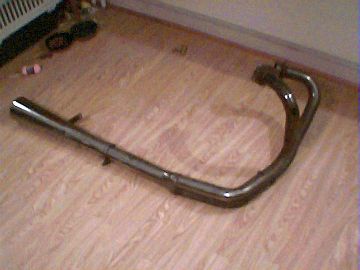
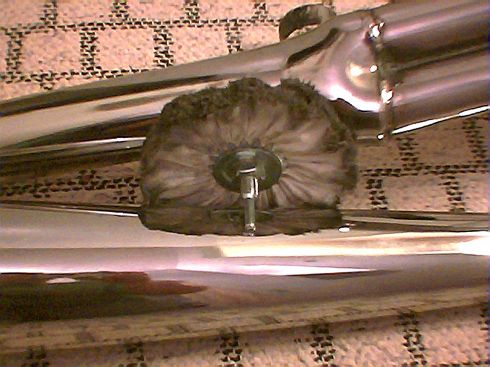
I tried chrome cleaner at one brownish location and for my surprise shining metal
was found.
The next step was to equip electrical drill with a brass brush.
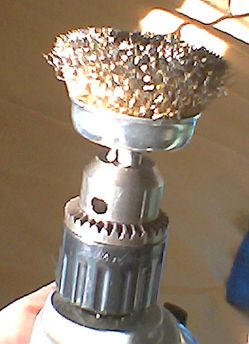
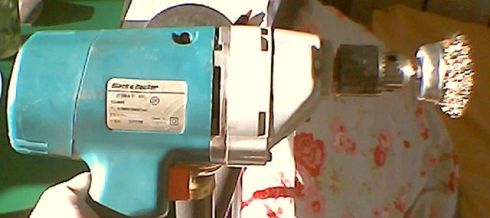
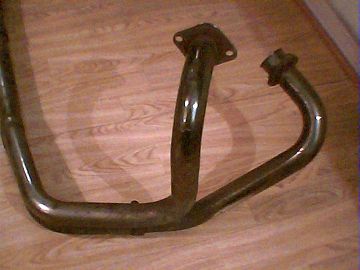
After going through all the surfaces the look of the exhaust is starting look
like in eBay ;-)
The chrome polish is quite surprising chemical. With some elbow grease and
cotton wheel of the drill I managed to make the exhaust look great. Of course there
are some coloring close to cylinder head and some corrosion needed to deal with
heat tolerant paint. But totally it looks excellent $80 2-1 exhaust :-)
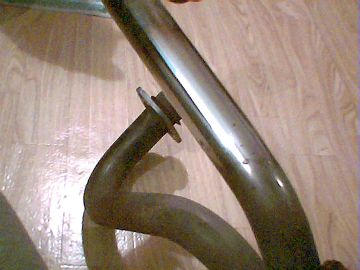
Because I have heard stories of the quite loud noise MAC 2-1 exhausts produce
I've prepared myself also a "plan b". I will buy suitable inner tube (1 3/4 inch outer diameter)
for the 2 inch diameter collector pipe. With that pipe I can use one of my existing
SITO mufflers and then decide will I use the original muffler or buy a more quiet one.
7th Nov 2004
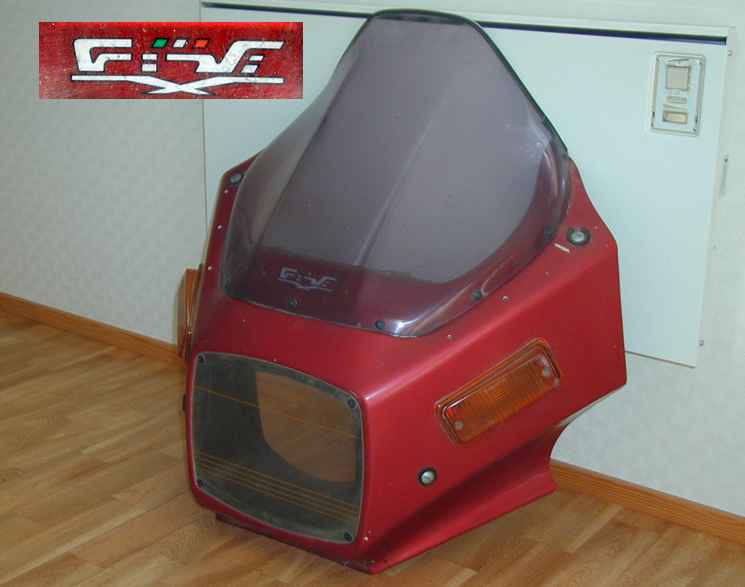
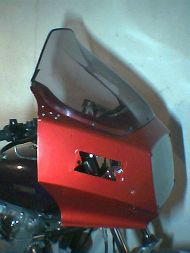
One day I noticed at the "local eBay" Huutonetti old GIVI fairing was on sale.
My bid did not reach the reserve but after the bidding time closed the seller contacted me and
we agreed about the price but I wanted to see & touch the fairing before setting the case.

The fairing (found at the cleaning of an attic) is most likely from 1980s,
duplicating the first Suzuki GSX styling.
I'm not yet even 100% sure if it will suite my XS650, but we'll see...
I started the refurbishing by disassembling all parts easily removable and
cleaning them thoroughly.

There was one rupture around the left upper mounting point that needs fixing and
strenghtening.

There were also extra holes to be filled and painting will need some patching
but generally the paint was in quite good shape.
15th Nov 2004
I started by filling the all extra holes with two component clear epoxy. It is easy
to fill those holes if you use clear tape outside:

After hardening of the epoxy you'll have "a clear window" (when using clear epoxy).
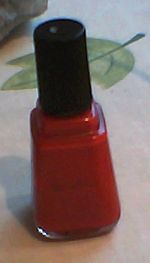
I was lucky to find a bottle of nail polish with the exactly right color
and almost free. (It was a half full used one ;-)
I'm using that to fix those holes and other small defects in painting.
The top left mounting point had a rupture and I fixed the both top mounting
points with a steel plate glued in place with epoxy with four extra screws.


The next step was to evaluate shall I continue at all with this fairing.
I took the fairing to the garage and fitted it in place.

I must admit that I was quite satisfied. This fairing has some real shielding
ability and it did not look too big and heavy for XS650. And the mountings
seem to be in usable places.
I replaced the lamp mounting bolts with longer ones and turned them to have nuts
outside (not inside as normally). Now I can easily use lower mounting brackets
provided with the fairing. Those brackets need some "tuning" (bending) to fit
but that will be done later.

13th Dec 2004
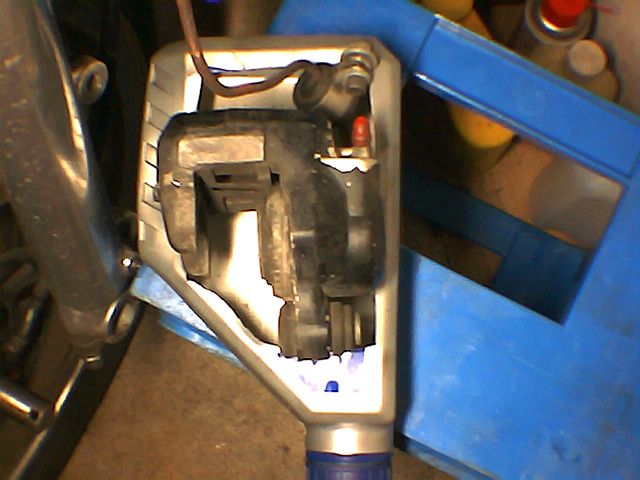
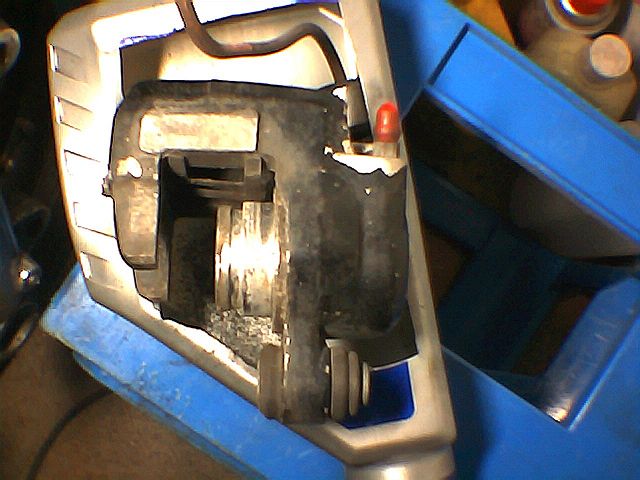
I have read and heard many stories about disk brake caliper disasembly and especially
about how to push the piston out of caliper. Usages of compressed air or grease gun...
Then I read from some years old Classic Bike magazine about the easy and self evident
way.
The first thing is not to drain brake fluid. Just take the caliper out of brackets and
disk pads away. They lay the still connected caliper over a suitable container.

Then keep pumping the brake lever and the piston starts to emerge. It also helps
if you take out any dust covers or other outer seals.
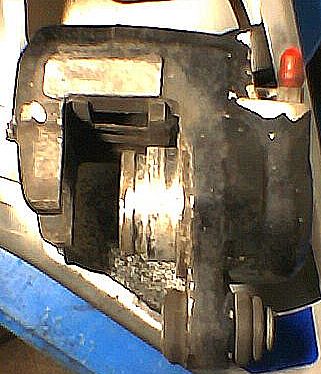
The next important thing is to keep the resevoir (at master cylinder) filled all
the time.
And finally the piston drops out and brake fluid pours to the container below.
No sweat, no special tools or equipment needed.
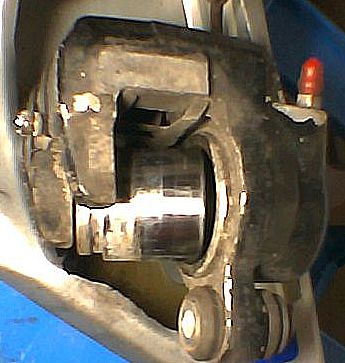
This is easy for the floating caliper with only one piston. If you have several pistons
you should somehow "lock" them with a clamp to a "almost" fully out position and press
others - one by one to that position.
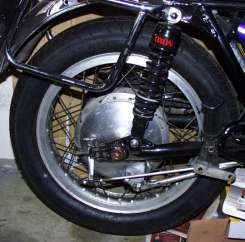
29th Dec 2004
The original swing arm bushings lubrication is done with grease nipples at the both ends
of the shaft. The route from nipples to bronze or original plastic bushings is very
long and complicated and easily gets blocked by the hardening grease.
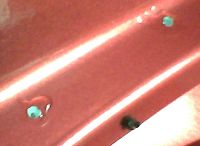
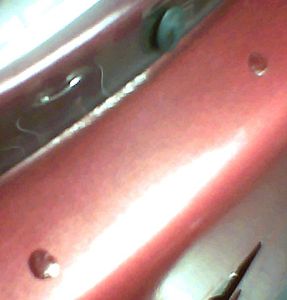
The best solution is to install an additional grease nipple in the swing arm itself, below
the swing arm and use a pointed nipple for ease of use. And do this when you have disassembled
the whole system.
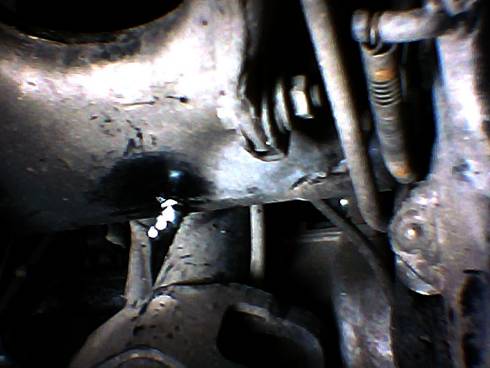
I got the idea to try it with the swing arm still in place. And it worked. It is not the nicest
job to drill a hole from under towards up. I started with 3mm drill then switched to 7mm drill.
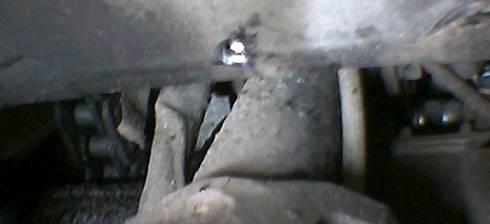
I had grease nipples with 8mm threads. So I tapped the hole and screwed the nipple in place.
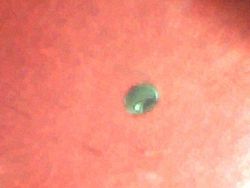
The nipple was not pointing exactly where I wanted and grease was leaking little under
the nipple but It looked like it's working when I pumped a bit grease in. The final testing will
be at the riding season.